
And the announcement - Keep a look out for the 100th post giveaway coming soon!!
For this post you can enjoy these birdies sitting on trees.

I was very inspired by Becca from Blue Cricket Design. She made this bird wall art here. Check it out, it even has a video of her TV interview explaining the process. I have been trying to attempt this since ages and finally could complete it last week. My guest bedroom walls were bare and with family coming down for a visit it was the perfect time to get this done.
The raw materials used are - 2 canvases of the same size (mine were 11x14), fevicol, permanent markers in black - one thin to outline and one thick tipped to fill in, a pencil, the local yellow pages directory (which was free by the way) and printed bird images off the internet.

I chose the pages from a yellow pages telephone directory. Like Becca suggests you can choose any material - newspaper, pages from an old book, scrapbook paper, gift wrapping paper etc. Let your imagination go wild!
I started with mixing 1 part of fevicol with 1.5 parts water. You can thin it out further if it seems too thick. Thin is easy to spread with a brush. Next I tore out random pages out of the telephone directory and spread the fevicol mixture on one side with a brush. Then I stuck the pages on the canvas in any shape and manner that you want to. Random is good. Overlap, overlay and cover the sides of the canvas too.
Once both the canvases were done I kept them overnight to let them dry out completely.

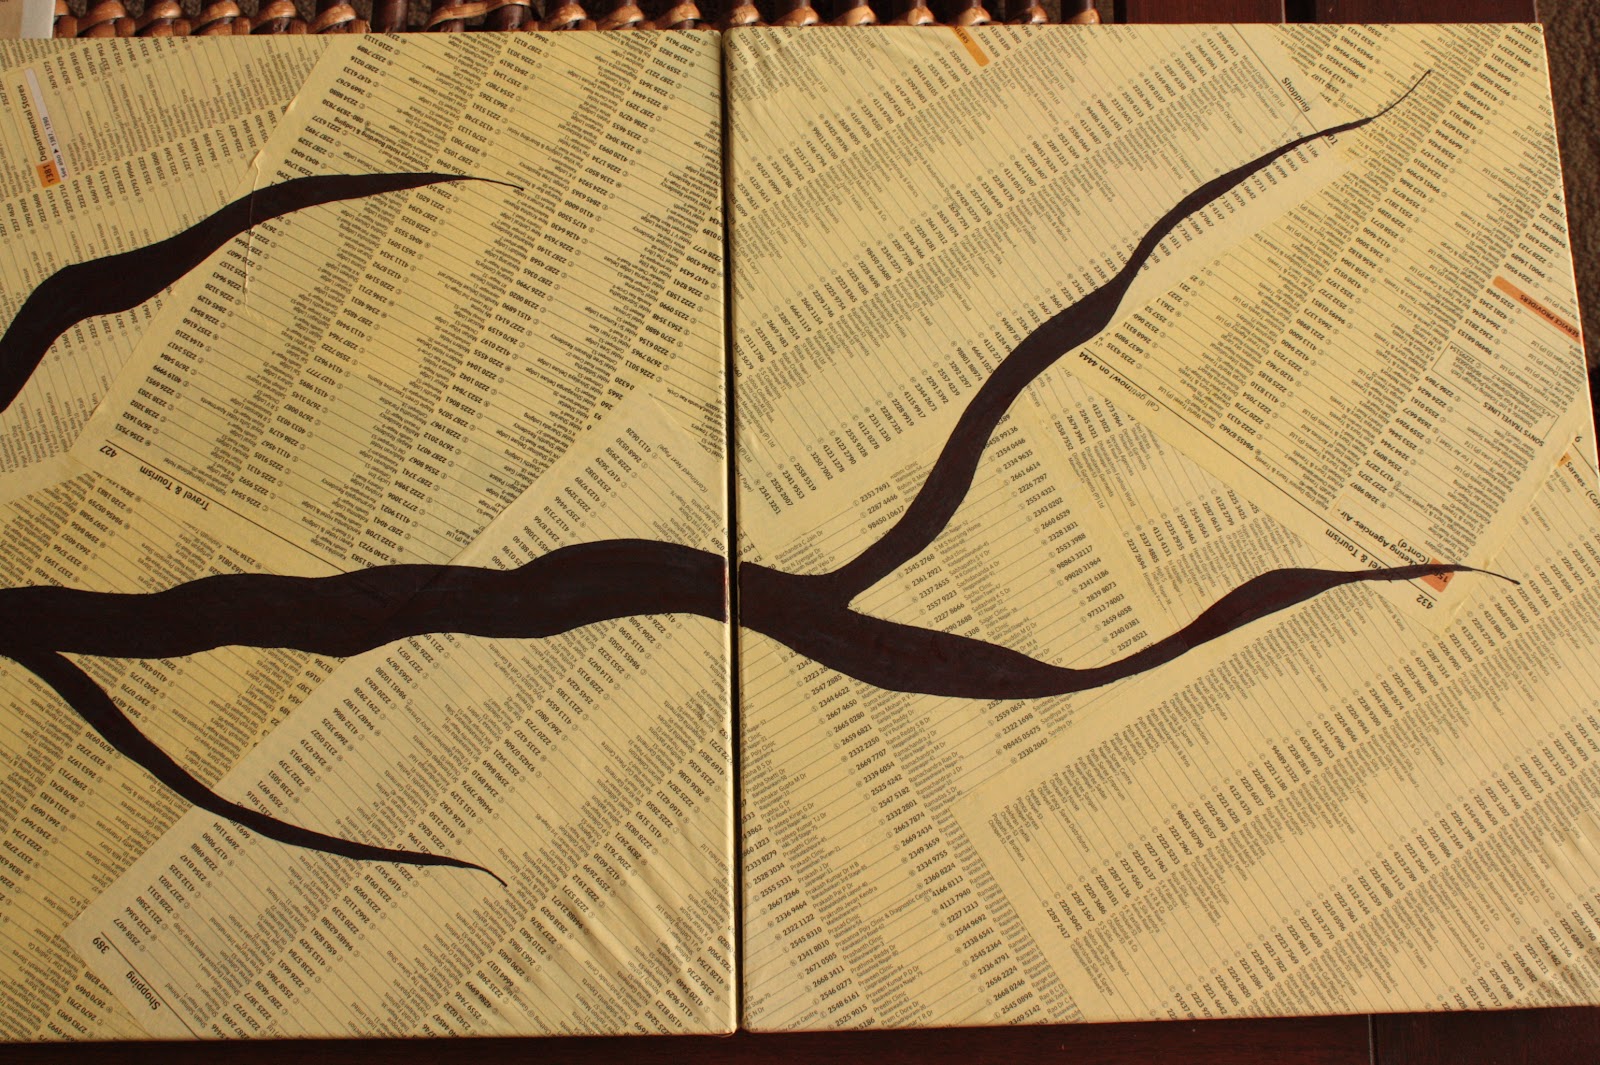
The next day I started with drawing branches on the canvas freehand with pencil. Make sure that you continue the branch from one canvas to the other to get the illusion of one single branch across. Once the branches were done I outlined them with the thin marker.

Then filled them in with the thicker marker.
Once the branches were all done I placed the bird images at different places and traced the outlines. For the bird images I googled birds on the internet and printed them out. You can also stick the images onto a harder paper like card stock and cut along the outline. This will make it easier to transfer onto the canvas.
Then I filled in the birds and added the details like leaves and small branches. After this I coloured in the images one last time to ensure an even colour.


It looks lovely on the guest room walls, haven't been able to take pictures of that yet. But here are some more pictures. I already got some great reviews from the guests :)


Linking this in to Patty's Weekend Wrap Up!
Congratulations on the 100th post! and that is a lovely piece of art..as always...:-)
ReplyDeleteLovely art Simran. Very well done. And congratulations on your 100th post. is your family already here. Say my Hi to them.
ReplyDeleteHaritha
Nice! Congrats on the 100 :)
ReplyDeleteCongrats!! Just love the art.. i'm definitely going to make this someday :)
ReplyDeleteKool stuff and congrats on the 100th post :)
ReplyDeleteThanks Uma!!
ReplyDeleteHaritha - Thanks! Yes my in-laws are here. The next set (my parents and sister are arriving next week). Will pass on your hello!
Thanks Arundhati!! :)
Sure Shuchi. Give it a shot, its so easy and looks great!
Thanks Parul!!
Congrats Simran, on your 100th post!
ReplyDeleteYour artwork looks great...I saw this myself on BCD and wanted to try it out. Yours came out wonderful!
WOW 100th post - Congrats!!!! Lovely art - Just loved it .
ReplyDeleteLooks so beautiful! Easy right! Thanks for sharing your post with me and congrats on the 100th post! Woot woot!!!
ReplyDeleteThanks Neha!! BCD has some great ideas and this was one of them.
ReplyDeleteThanks for the comment and for dropping by Shanthi!!
Thank you Becca! It was super easy and looks awesome!! :)
100 WOW!!! Congrats...
ReplyDeleteThe wall art is awesome!! I am definitely gonna try that :)
Congratulations for the 100th post Simran...and what lovely art work...looks fantastic!
ReplyDeleteThanks Rema and Anpu!!
ReplyDeletethis looks so cool,.congrats for 100th post
ReplyDeleteThanks Notyet100!
ReplyDeleteHi there! First time here and can't stop drooling over your blog. You have some awesome, but achievable, decor ideas. I've bookmarked some of them for my new home. Congrats on the 100th post.
ReplyDeleteCongrats on the 100th post...
ReplyDeleteMy wishes to celebrate many more 100 posts at your blog...!!!
This is such a lovely idea... I like the birdies sitting on the tree and the yellow-pages background is looking awesome...!!
I did something like this with gift wrapper before.. but on the lid of a carton box... !!
Hi. Hopped over from Arundhati's.
ReplyDeleteVery creative stuff!
Thanks for dropping by choxbox :)
ReplyDeletevery creative.. :)
ReplyDeleteTotally loved this... its gorgeous!! I've been dreaming of drawing something similar on one of my walls... Just cant seem to get myself.. to doing it.. :-)
ReplyDeleteThank you Shruti and Patty! Its so easy to do and looks great :)
ReplyDeleteWow! That's creative. I love the graphic punch of the birds against the paper..... lovely!
ReplyDeletelove this one.. bookmarked.. will try it someday...
ReplyDeleteThanks!! :) Tell me how it turns out when you do!!
Delete